7 Inexpensive DIY Organizers for Your Home
Getting your home truly organized will eventually call for some organizers. Bins, baskets, containers, dividers, and more. Although most would love to purchase all of these things in one fail swoop they can get expensive… sometimes very expensive.
Why not save your money and create some inexpensive DIY organizers that will transform your home without breaking the bank?
If you think DIY organizers will always look cheesy then you haven’t seen these amazing transformations of everyday items hanging around the house. Things you would never think to re-use can be so useful for decluttering spaces that need help.
Even the least crafty person can get behind some of these incredible DIY organizers for their home. All it takes is a little patience and the desire to finally get that junk drawer organized.
Don’t get me wrong I still love perfectly fitting air-tight containers for my pantry or large woven baskets for my closet shelves. If you are holding off on decluttering and organizing because you feel without these organizers you can’t move forward, then you are wasting your time when you can simply DIY!
What is especially hard is that if you do not organize anything because you’re waiting for that payday where you can go out and spend some bucks on organizers, there is a possibility that payday may never come. That means nothing will ever get organized…
The point of organizing is that you provide yourself with a much-needed release of power a messy area can hold over you. A messy environment can cause unnecessary stress, anxiety, and a clouded mind. Keyword, unnecessary!
So with that said, stop putting off your decluttering and organizing efforts becuase you feel you do not have what you need to get organized.
Quite the contrary, you probably have everything you need already at home all around you and you didn’t even realize it!
Thanks to peoples’ creative innovative thinking, there are now dozens upon dozens of clever DIY organizers people have made out of everyday items that look high end, expensive, and are incredibly functional.
So the questions is what do you have laying around your home you didn’t even realize you could use to transform your home into an organized space?
Need some ideas? Keep on scrolling!
(This post contains affiliate links. If you purchase a product or service with the links that I provide I may receive a small commission. There is no additional charge to you! Some of the amazing following photos are not my own, click on them to head straight to the source!)
01 | THE DIY CARDBOARD BOX ORGANIZER
How many times do cardboard boxes come into your life on a regular basis? Amazon, UPS, Fed-ex, Cost Co, work, etc. We naturally break these down and toss out, but that’s a big mistake! Instead, keep your cardboard boxes and transform them into organizer containers around your home. Here are a few ideas you can do with cardboard boxes you must see to believe!
01 | Cut off the flaps of any cardboard box and you have a bin, it’s that simple.
02 | Take it a step further and decorate the cardboard bin to make it look more high end. Some ideas are you can paint it (ombre looks very trendy), wrap it in fabric, slather the sides with glue and wrap twine or rope around it, or you can cover in contact paper.
03 | You can completely cut down cardboard to pieces and measure out the same size per bin you wish to create. Glue the sides together and decorate how you please. This is great for areas where you need a lot of the same size bin like the pantry or laundry room shelf.
02 | DIY ORGANIZER DRAWER DIVIDERS
Drawer dividers can be two things when purchased at a store. One, expensive, two, doesn’t fit. Those odds are not great so why deal with the headache when you can very easily make drawer dividers yourself? Remember those flaps you cut off from the cardboard boxes to make bins, keep those! Measure and cut to fit to create your own drawer divider that is custom to your needs.
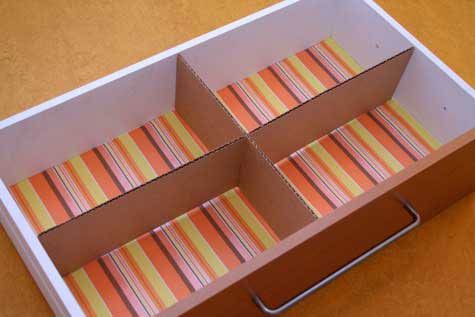
01 | We all remember cutting two pieces of paper on opposite ends and sliding them into one another to create a three-dimensional standing object. Think of grade school shoebox dioramas! You can do the same with cardboard. Create a grid that slides into each other to create instant organizing storage! See the photo below.
02 | Cut long strips of cardboard and tape to the inside of your drawer to create sections.
03 | Take your DIY drawer dividers a step further and paint them or wrap in contact paper to instantly make them look a little more elegant.
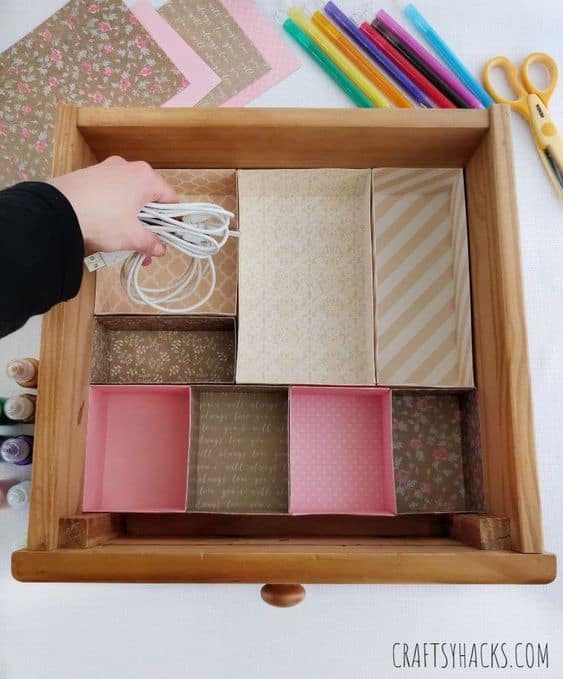
04 | Don’t throw out those cereal & food boxes! Cut the top off to reveal a shallow bin of various sizes that would fit perfectly inside a drawer. Paint or wrap in paper to make it look custom and complete.
05 | If you have any paint sticks, spare pieces of wood, or balsa wood (super thin easy to cut wood from a craft store) then you can easily cut and glue your own DIY drawer dividers!
03 | THE JAR MAKEOVER
We end up with glass and plastic bins, jugs, and jars all the time. We dump out the pickle juice and recycle the glass jar with no afterthought. We squeeze out every drop from the shampoo bottle and then we toss it without blinking. All of these everyday items can easily be transformed into multiple DIY organizers from your home you didn’t even realize you had!
01 | Collect your shampoo and conditioner bottles (especially if you use the same ones over and over again). Once you have a collection cut off the top to reveal little buckets you can use to organize small things.
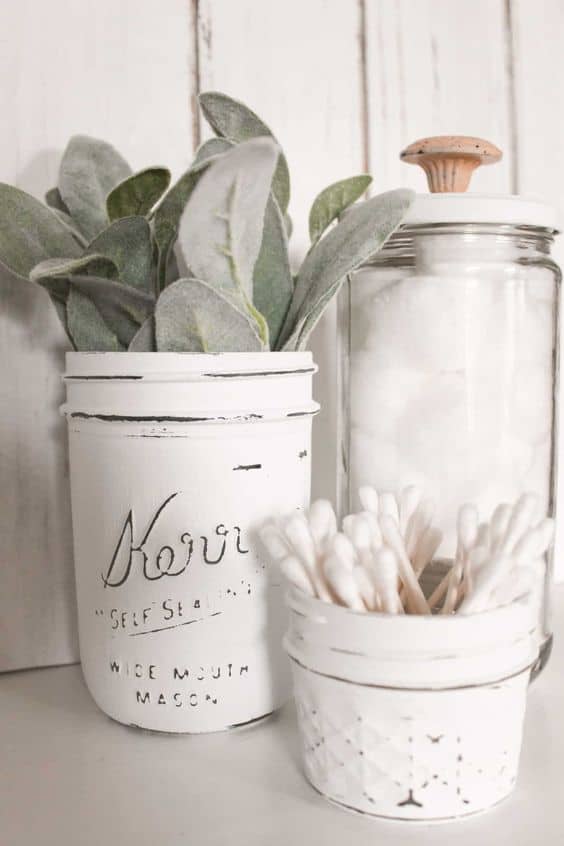
02 | Glass jars can easily be painted to create uniformity. Spray paint all the tops a matte black for classy pantry storage. Or paint something fun and bright to organize small office supplies. The possibilities are endless.
03 | Plastic jars and jugs are also great up-cycled DIY organizers you can easily make! From mayonnaise jars to soda bottles there are so many ways you can re-use items to make your home just a little more organized!
04 | THE CONTAINER MAKEOVER
I’m sure if you were to pull out every container and bin you have in the home and put it in the middle of a room you would see quite a collection of oddball colors, shapes, and sizes. Sometimes the containers themselves can make your home look unorganized which is such an oxymoron since they were designed to help you organize!
Take a moment to think about how you want your home to feel. Are you loving the farmhouse trend, do you love pops of color, are you into bright whites or contemporary black? Whatever your taste is, make sure to transform your existing containers to reflect your home design! That means spray painting your existing containers or maybe adding decorative touches line a twine-wrapped edge.
Here are some clever container makeovers you may want to consider for your home!
01 | Paint plastic container with an ombre affect. Such a fun and classy way to makeover your containers! It’s a great way to add a little bit of color without being overwhelming.
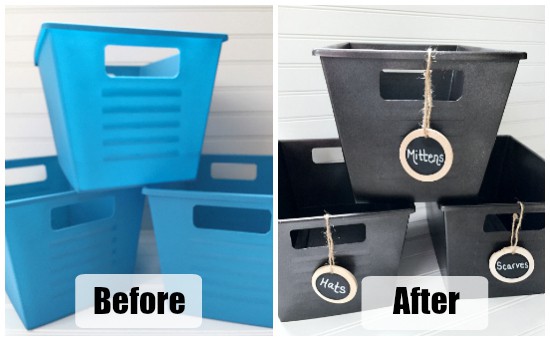
02 | DIY galvanized metal containers. Farmhouse style is trendy and to be honest, it’s turning timeless. It’s soft and versatile and neutral enough that it can easily be implemented into anyone’s home decor. If you love the metal look but cannot afford the containers then spray paint them with metallic paint!
Related Read
How to Organize Your Life Using Binders
05 | DIY ORGANIZER LABELS
In my opinion one of the most effective but inexpensive way to really organize a space is to add matching labels. Even the most mismatched containers and items can look cohesive if they all display a matching label!
Here are some clever DIY options you may want to try.
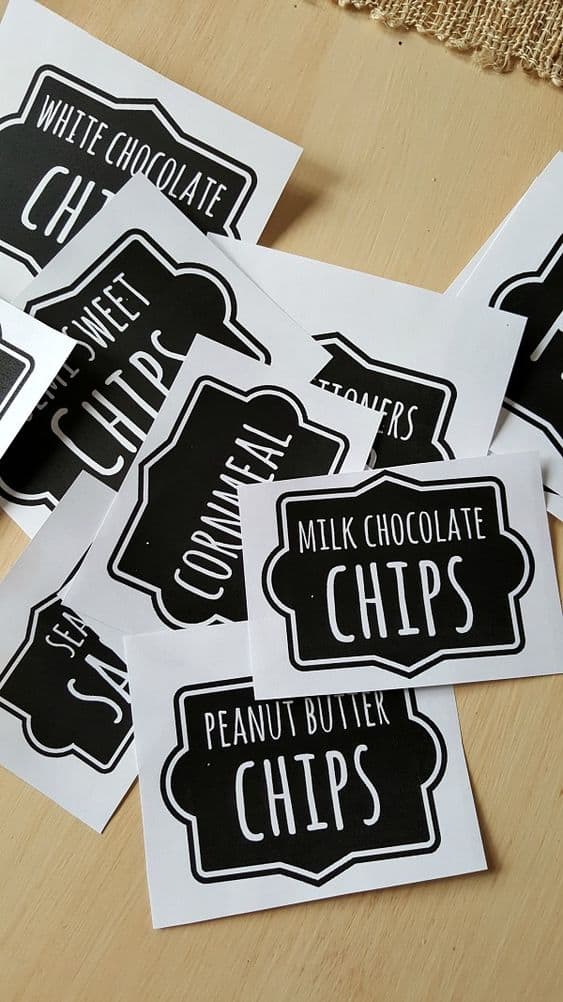
01 | Old fashioned handwritten labels. Grab some white copy paper, colorful paper, old blank stickers, or whatever will work for you and cut all the same size. Write out every label that you need and simply tape to the container needed. Use colorful washi tape to outline the label, or loop the tape to hide underneath the label for cleaner edges.
02 | Create and print out your own labels. Hop on word or Canva and create your own labels to print. Make sure to have everything the same size so as you cut out your labels they will look even.
03 | Scroll through Pinterest to find some amazing free printable labels already created for you to simply print out! From handwritten fonts, Rae Dunn, and farmhouse style there is something for everyone already created for you by some amazing creative geniuses!
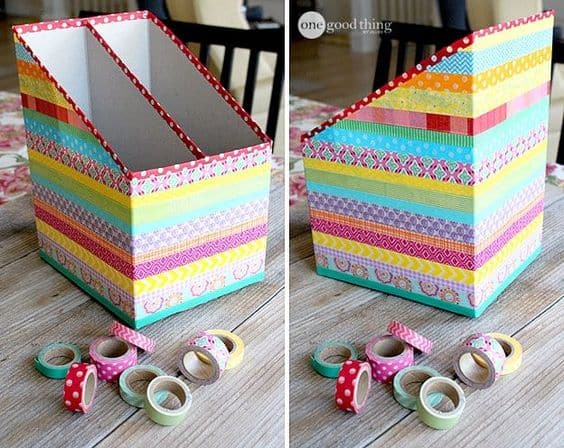
06 | DIY CEREAL BOX MAIL & PAPER CLUTTER ORGANIZERS
Mail and paper clutter will, unfortunately, never go away… So we must find sophisticated organizational solutions that are not only attractive but also functional. There are so many amazing and might I add expensive mail and paper organizers out there to purchase. If you’re in need of a quick fix now that will still look great in your home then you may want to consider some of these great DIY options!
01 | The cereal box mail organizer. Tape as many cereal boxes as you want together and cut down at an angle to create tiers. Paint or cover with contact paper and viola! You’ve created a free mail organizer that will look amazing!
02 | The cereal box magazine holder. Do not throw out those cereal boxes! Cut each one just like a standing magazine/paper holder. Paint or cover with paper to make as whimsical or sophisticated as you like.
03 | The wall-mounted cereal box paper organizer. Install vertical or horizontal to create your very own wall organization system with just simple cereal boxes. Cut to fit and nail directly to the wall or create a hanger. You can finally create that command center you’ve always wanted without the high cost!
07 | CANNED GOODS DIY ORGANIZERS
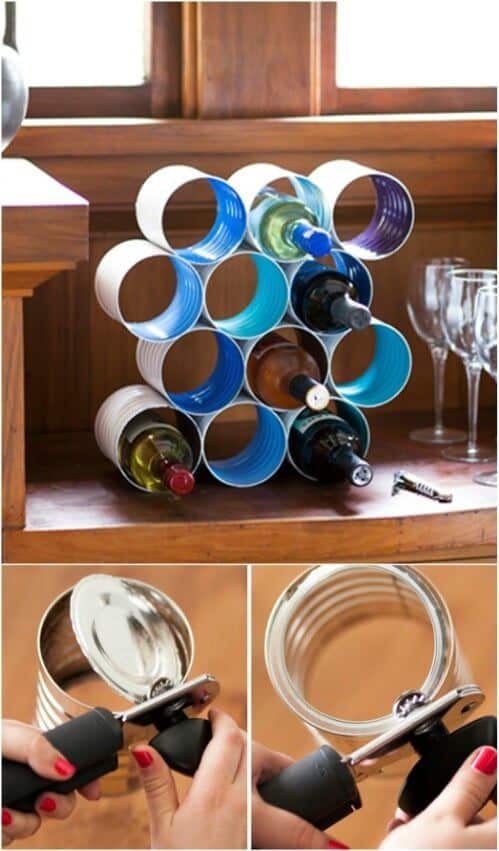
Have you ever peeled off the paper of a can of baked beans to reveal a perfect metal tin? It’s actually shocking that we end up throwing so many of these away not realizing how valuable these little tins are for organizing! So start to save these cans to create dozens of DIY organizers for drawers, offices, shelves, and even super smart wall mounted organizers!
01 | Create a DIY wine rack by gluing metal tins together. The more you add the sturdier it becomes. Go the extra mile and spray paint the whole thing or add pops of color by painting the inside of the can.
02 | Wrap the cans in fabric, paint them or use twine, yarn, or even sticks to create decorative holders for anything in your home. As you can see below there are dozens of unique ways to upcycle your tin cans into something useful for your home.
Creating DIY organizers for your home doesn’t have to be complicated. A simple coat of paint and a little contact paper is all that is might take to make your own organizers that are functional and beautiful.
So think twice before you throw away anything and ask yourself, ” how can I organize my home with this?”
Save the planet, your sanity, and your bank account all at once by making your own DIY organizers.
Happy Decluttering!


6 thoughts on “7 Inexpensive DIY Organizers for Your Home”
I enjoyed this post very much and all the great, creative ideas for organizing storage! I’ve been buying bins a little at a time for the past year, and yes, they can be expensive. I’ve had some in my “save for later” box at Amazon for the past month… I’ll definitely be trying some of these ideas. Thanks for all your great organizing tips and ideas.
Hi Dixie! Thank you for the kind words!
I found this ideas quite interesting, something I’ve never thought of.
I’ve been looking for closet organizers, in particular those hangers that hang several things in one.any ideas how these can created?
Thank you for the great organizing tips, I’d never thought of using tin cans!
I wanted to add my go to tip to the list.. you know those rectangular plastic plastic containers that mushrooms come it.. those are excellent organizers as well. I even stack them and bring them along in vacation to put my toiletries in, while staying in hotel rooms.
Laura that is a great idea! Love it. There are so many innovative ways to re-purpose, thanks for the share!
Comments are closed.